

Before you start
- An early-access link from Kubit, or an invite from someone already in your organization
- A work email address. Kubit refuses personal and free email domains.
Steps
Sign up
Open the early-access link. It takes you to the Sign Up screen.Enter your Work Email and click Continue. To use your Google account instead, click Continue with Google.Without an early-access code or invite in the link, Kubit shows an Invite only card instead of the form.
Verify your email
Kubit sends a code in an email with the subject
Verify your Kubit account. On the Check Your Inbox screen, type it into Verification Code.Click Continue. No email? After 30 seconds, a Resend link appears under Don't see it?.Choose how you sign in
On Secure Your Account, pick Create Passkey or Create Password. A password needs at least 8 characters, upper and lowercase letters, a number and a special character. A passkey signs you in with your fingerprint, face or a security key. Join your team on Kubit covers passkeys in detail.
Name your organization
Your new organization is called 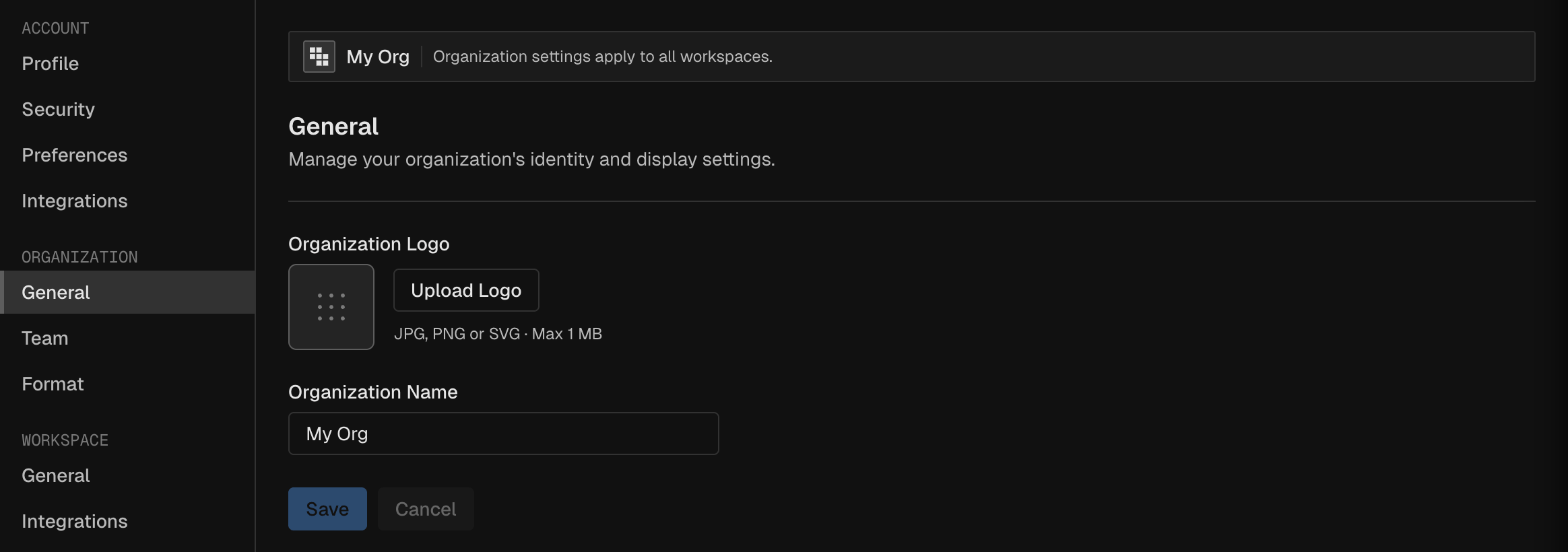
My Org until you rename it. Go to Settings > Organization > General, change Organization Name and click Save.Create a workspace
A workspace holds one set of data (agent traces, clickstream events or both) and the reports built on them. Open the workspace switcher at the top of the left nav and click New workspace. The first time you sign in, onboarding shows Create Demo Workspace. Click Set up my own workspace there instead.On Create Workspace, fill in: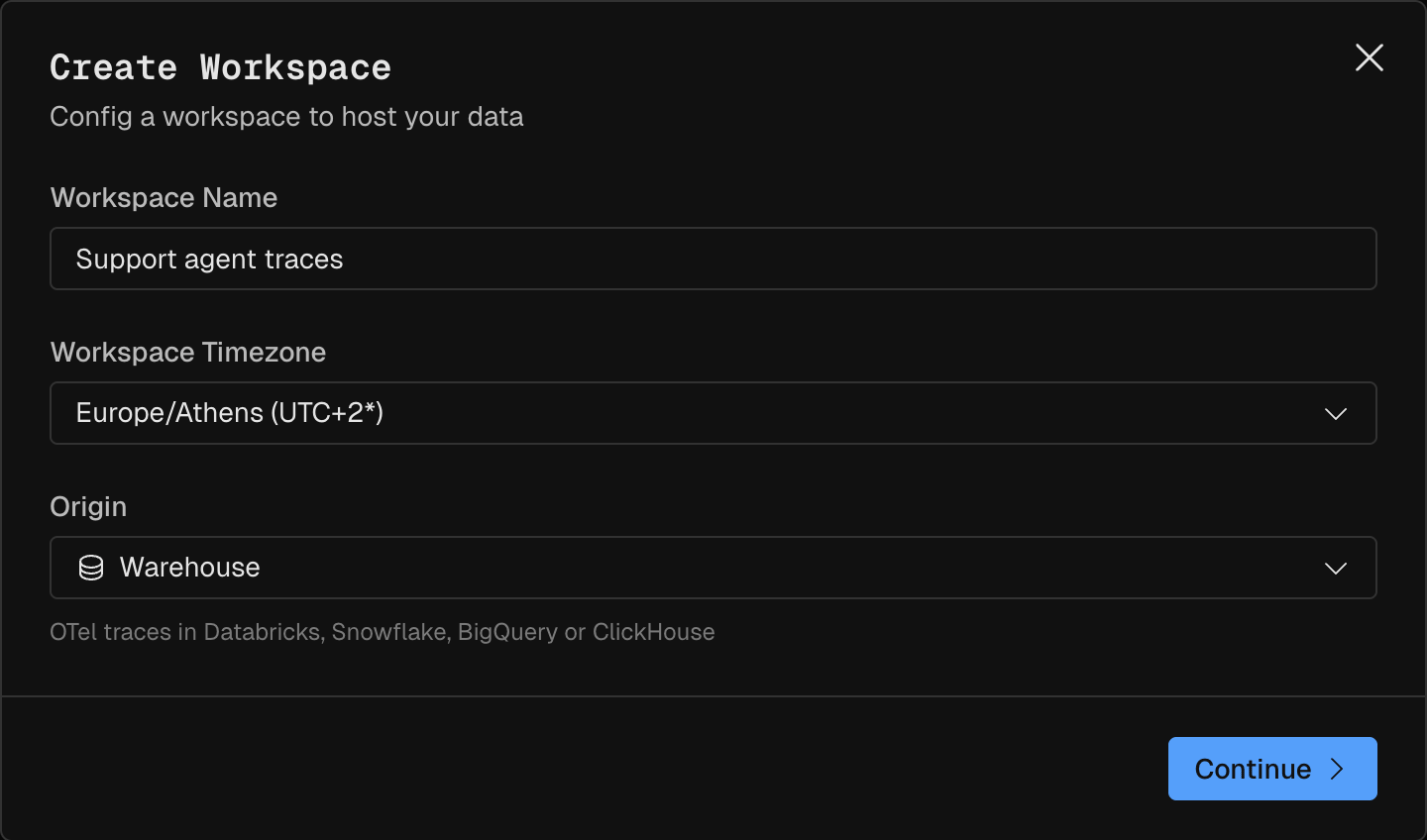
Add your data
How you add data depends on where it is. Pick the row that matches your data and follow its page.
To reuse a warehouse connection your organization already added, click Use existing in the Modeler.
Invite your team
Go to Settings > Organization > Team and click Invite Member.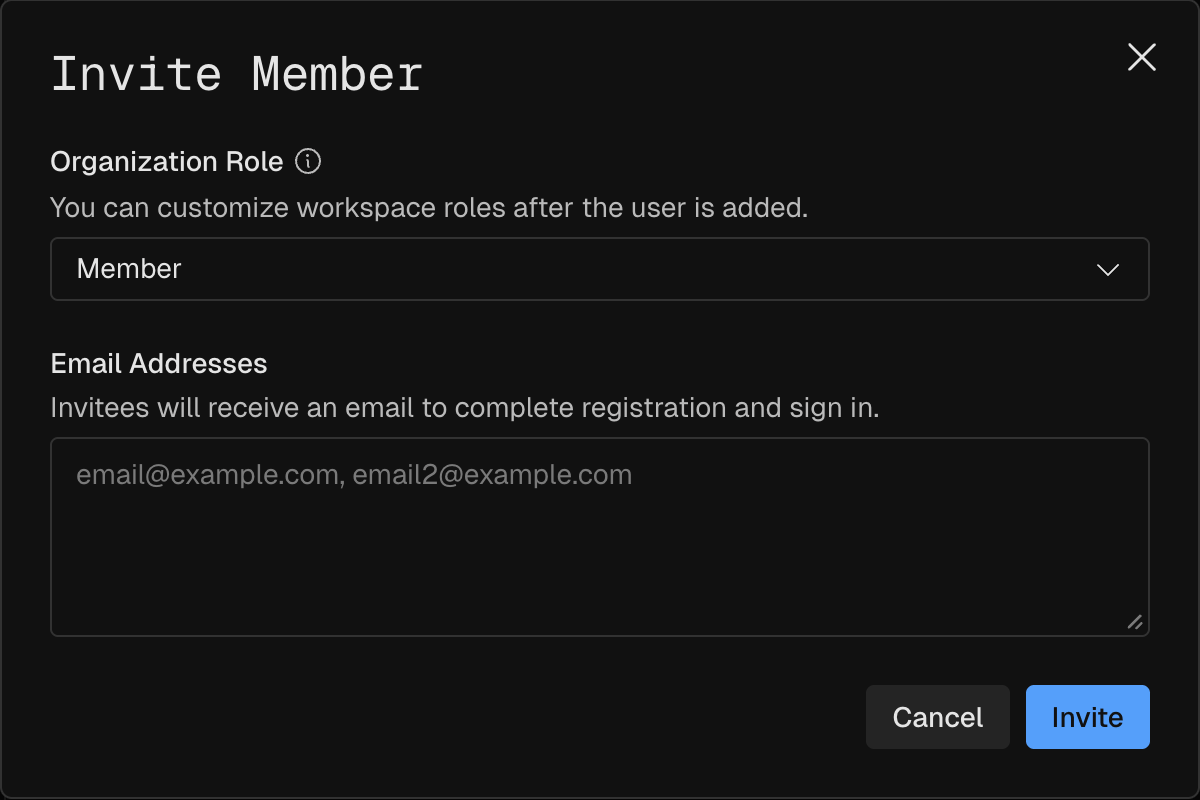
Invitation sent. Each person gets an email with the subject Welcome to Kubit and a link to join. Invites don’t expire.You give each person one role for the whole organization. To change someone’s role in one workspace, use that workspace’s column in the Team table after they’re added.Roles
A role decides what someone can change in the organization and its workspaces. Roles rank Owner, then Admin, Member, Viewer and None.
Admins can’t change an Owner’s role, and Owners can’t change their own role. The person who created the organization is an Owner like any other.
Limit someone to some workspaces
The None organization role gives someone access only to the workspaces you pick. A person with None is an active member of the organization but has no permissions and sees no workspaces until you give them a role in one.
An invite sets only the organization role. Giving someone access to some workspaces takes two steps:
- Invite them with Organization Role set to None.
- In the Team table, set their role in the column of each workspace they need.
Manage invites and members
The Team page has three tabs: Active, Pending and Deactivated.Verify
Open Settings > Organization > Team and click Pending. Each person you invited is listed by email. When they accept, they move to the Active tab.If it fails
Next steps
- Join your team on Kubit: what the people you invite see, from the email to their first report.
- Bring your own warehouse: connect Snowflake, BigQuery, Databricks, ClickHouse or Redshift.
- Quickstart: send spans with
kubit-otelinto an Agent workspace. - Data sources: send clickstream events from a customer data platform.